Several Recommended iphone Repair Tools on PHONEFIX
There are some recommendation repair tools today. So of you want to repair your iphone and select some tools and equipment, you need select the best tools. The best tools and equipment will give your convenience and long-term interests, and will help you to repair the mobile phone easily and comfortable. Now please follow Vip Fix Shop Team to select the best tools.

Recommend 1:3.5X-90X Stereo Zoom Microscope
HD Trinocular Stereo microscope dedicated to mobile phone repair master, high temperature resistance aluminum alloy repair base Platform (size: 47cm*32cm 4.0kg), with silicone pad / repair parts / screwdriver / solder paste storage slot, customized HD microscope is a trinocular high-definition continuous zoom microscope which is specially designed for phone repair master. This professional microscope for mobile phone repair can get the phone motherboard welded easily.
Recommend 2:Soldering Station
It can accord to the heat requirement of the soldering job to control temperature. The soldering iron is attached with the soldering station. It is better and more convenient than traditional soldering iron. It makes soldering work much easier and faster. When you buying a soldering station for your iphone repairing, you can select an ESD-Safe (Antistatic) model. It is designed with digital display and PID control temperature can make your repairing proccess more convenient.
Recommend 3:Solder Wire
Many solder wires are made of wire Tin / Lead. And more and more companies are using lead-free solder. Solder wire is available in different diameters such 2.0mm, 1.5mm, 1.0mm, 0.5mm, 0.2mm etc. For mobile phone repairing 0.5mm solder wire is best suitable. Soder Wire is phone motherboard fix tool,it is used to solder electronic components on mobile phone PCB, ICs jumper. This soler wire is available in different diameters with 1mm, 0.8mm, 0.6mm, 0.5mm, 0.3mm. The solder wire is very easy and convenient to used for mobile phone repairs.
Recommend 4:Tweezers
Vip Pro Shop Team recommend you the Titanium Alloy Tweezers, it is 0.15 mm high precision phone motherboard jump line repair tool. And they are used for all soldering repairs, wire copper soldering repair on cell phone motherboard, fingerprint jump line repair for mobile phone PCB welding. The fine tip repair tweezers are high quality with anti-corrosive, anti-Magnetic features so that can keep long-lasting service for your cell phone repair.
Recommend 5:Doule Suction Cup plier
Doule Suction Cup plier is universal phone repair tool, it is design to lift and remove glass or screen from LCD screens for mobile phones, laptop, smart phone, PDA, PC or other applications. The suction cup plier will offer safe and simple way to lift or move parts for your disassembly repair. It is a handy tool that can make your repairs more easily and quickly.

Recommend 6:Antistatic Mat
Phone Fix Anti-Static Mat is universal phone maintenance tool. It is hot temperature resistant mat with different storage parts for the variety of small components and tools. This anti-static BGA soldering repair pad is high-quality with lots of advantages: anti-static, anti-corrosion, anti-slip, non-deformation, foldable. It will offer perfect service for your mobile phone maintenance.
Where to Find the Best iphone Repair Tools
In order to repair Apple product or every electronic products, so you' ll need a unique toolkit, which includes every type screwdrivers and pry tools etc. Now I will introduce some tool kits for you. Using the exact size and type required are important. You' ll find complete screwdriver kits on Vip Pro Shop Team, designed for use with small technology.
Recommended new products:
SSK SHU011 USB2.0 HUB Power Splitter
SSK SHU011 USB 2.0 HUB power splitter with 7 USB Ports rechargeable converter extender, SHU011 USB2.0 is HUB extender with independent power supply, and 7 interfaces can be used simultaneously. SHU011 USB2.0 can plug and play 1.5M, extented 7 USB interfaces and almost all USB product is compatible, support 99% USB interfaces.
SSK SHU011 USB2.0 HUB power splitter with 7 USB Ports converter extender, fit with almost phone repair USB dongle: ZXW / WUXINJI / EFT / MRT / Feiying...
HUB SHU011 with power supply 7 interfaces imported chip High-speed transmission.
Extented 7 USB interfaces, Almost all USB product is compatible
Support 99% USB interfaces
USB 2.0 high-speed interface, secure and stable, can be connected with USB wire of almost all devices just like USB, video camera, printer, mouse keyboard, Galaxy Tab, Samsung, Mimi, iPhone, etc
1. Pentalobe Screwdriver
This is Apple security screw, used to attach the iPhone bottom case (including Pro/Air) in order to fix the iPhone together. Although the screw head consists of a five-pointed star, people sometimes call them Apple Star. Getting a complete set of Pentalobe screwdrivers isn' t hard, and it's better to buy this type of screw, too.
2. Torx Screwdriver
People sometimes call them Star screwdrivers because the screw head is a six-pointed star. Torx screws in Apple products are found in diverse locations, it will fix iPhone screen in place, can hold down ribbon cables, to fixing components to a logic board etc. Basic Torx screwdrivers are numbered T1 upwards. Many kits with interchangeable magnetic bits include T3, T4, T5, and T6 sizes, but then switch to TR7, TR8, TR9 and TR10 for the larger sizes in order to provide the most flexibility.
It is another type of security / tamper-proof screw design that' s also called Y-wing. Apple uses almost microscopic Tri-wing screws in the Apple Watch but the most common usage when it comes to use is the Y1 tri-wing used to fix certain MacBook Pro batteries in place.

4. Philips Screwdriver
Apple continues to use Philips-style screws internally on modern Macs. It has cross-shape head, and be used the tiny screw sizes utilised in Apple products.
Other than screwdrivers, your kit should contain a handful of other essential tools:
1. Spudgers
We also called it "phone opening tools". Outside of screwdrivers, any Apple toolbox has the spudgers, also perhaps more accurately as pry / prise tools. Spudgers has in a variety of shapes and sizes, and are constructed from plastic, or sometimes thin springy metal.
2. Suction Cup
These has in various sizes and are typically used in co-operation with spudgers to remove glass. Once you remove the screws, you simply attach the suction cup and then pull its handles to lift away the glass.
Larger suction cups have the necessary seal, while LCD screen opening pliers face off two suction cups to provide a neat way of opening iPhones.
3. Tweezers
SWD Tweezers are useful for catching a screw, or holding one in place while it's fastened.

4. Plastic Pry Scraper
The plastic scraper is mobile phone disassembly tool, it is used for opening devices, spreading thermal paste, and scraping. The handy opennnig tool can be available for iPad, tablet and mobile phones, it is very easy to handle so that will save both your time and effort for repair.
Professional Guide to Repair iphone 6s Rear Housing From PHONEFIX
Today, i will give you some best useful tips to repair your iphone 6s rear housing, so if you need to repair it, please see the following tips step by step, and i will give you best useful tips
Step 1 – The device must undergo a pre-check test, examining the entire phone for any unknown bumps or bruises.
Step 2 – The pentalobe scrto ews either side of the charging port must be removed first, loosening the screen from the mid-frame.
Step 3 – An tool slides under the screen splitting the adhesive and removing the seal between the mid-frame and the screen.
Step 4 – The PCB Connector bracket is unscrewed revealing the connector ribbon. This is disconnected with a plastic spudger ensuring the phone is now powerless.
Step 5 – Once all four screws are taken out of the bracket, the upper sensor array connector is exposed. Again, this must be removed with the spudger, disconnecting the screen from the device.
Step 6 – The adhesive ribbons under the battery are particularly difficult to remove. Too much force will snap the adhesive. The battery should detach from the mid-frame once the two adhesive ribbons have been removed.
Step 7 – There are two minute screws either side of the camera, these must be unscrewed, loosening the bracket and revealing the rear camera. A plastic spludger can pry the camera connector from the motherboard.
Step 8 – A Sim-Card ejection tool is pushed into the ejection hole, the tray should pop out with ease but this is all dependent on the condition of the rear housing.
Step 9 – Using a plastic spludger, the lightning cable is disconnected from the motherboard, allowing more space for the precarious process ahead.
Step 10 – The charging port antenna must be dislocated from its connection on the motherboard.
Step 11 – The same must be done for the upper earpiece antenna. This cable must be moved away from the device when removing the motherboard.
Step 12 – Two phillip iphone screwdriver opposite the flash bracket are first to be removed, freeing a tiny bracket.
Step 13 – Two screws holding the motherboard’s rear case are next to be removed: One by the Sim Card reader and the other is adjacent to the flash connector, highlighted in the image above.
Step 14 – The audio connector cable bracket is detached from the board and the three screws securing the antenna are removed. There are two more screws on the edge of the frame, these too must be taken out. This will free the wifi antenna from the device.
Step 15 – The screw grasping the rear motherboard frame can be removed and the audio control cable connector can be disconnected, The motherboard is no longer secured to the rear housing.
Step 16 – The bracket holding the flash in place must be removed. There are three separate screws either side of the bracket protecting the flash and the connector. The spludger is then used to pry the flash from the rear housing.
Step 17 – Before you attempt to work away at the flexes, there are a number of screws connected to the power and volume buttons which must be taken out.
Step 18 – A spludger is worked around the flex, lifting it from the case and prying the flash from it’s connector.
Step 19 – After removing the vibrating motor, the antenna running down the rear case must be pulled from the metal clip which holds it in place.
Step 20 – Five screws must then be removed from around the loudspeaker, we then use our fingers to lift and remove the assembly from the rear case.
Step 21 – Two screws must be removed from the headphone jack, there is also a screw situated on the microphone bracket which must be unscrewed.
Step 22 – Adjacent to the microphone bracket there is one screw to the left of the battery connector. The two screws securing the lightning charging must then be removed.
Step 23 – Finally, there are two small screws at the edge of the iPhone which must be taken.
Step 24 – There are two microphones either side of the charging port. The tip of a plastic spudger is used to split the adhesive securing the two components to the frame.
Some Tips to Repair Your iphone
Nowadays, many people always make some mistakes when they repair their iphone, so i will give you some tips to repair to avoid their mistaakes again
1. Multi-Function 8 IN 1 IPhone 6 6S 7 8 PCB Holder Iphone Motherboard Test Fixture
Multi-function 8 IN 1 iPhone PCB holder for iphone 8 8P 7 7P 6S 6, iphone A8 A9 A10 A11 CPU Maintenance platform, iphone 6 6SP 7 8P fingerprint and PCIE NAND positioning Jig Fixture Work Station, Multi-function Universal Portable High temperature iPhone Motherboard PCB Holder.
Operation Steps:
1. Place your iPhone mainboard in the specialized mold,fasten it by the metal Buckle.
2. Start to repair the mainboard with other tools like hot air gun ,knife and soldering iron.
3. Please pay more attention to the temperature on the mainboard and fixture to avoid scald
2. WL ISocket Jig IPhone X Double Layers Logic Board Test Fixture
WL iSocket jig is an professional motherboard test fixture for iPhone X double-stacked board, iphone X logic board Test Fixture is used for testing whether the upper and lower layer boards works well before reassembly, With this iPhone X double-stacked board test fixture, you don't need to repeatly disassemble and reassemble the upper and lower layer board because of necessary repair operation, WL iSocket jig will be the best assistant for professional iPhone X motherboard repair. 
Features:
1. Mini design, easy to carry.
2. Special Premium quality material
3. Preferred needle plate quality
4. High precision for holding iPhone X motherboard
5. Advanced inspection to avoid any damage because of repeated disassembly and installation
6. Easy to use, connect the upper and lower layer of iPhone X motherboard for fast testing.
3. MJ ZX10 IPhone X BGA Reballing Fixture BGA Reballing Tool
MJ ZX10 soldering desoldering platform for replace and rework the iphone X motherboard BGA chip, iPhone X BGA Reballing positioning Fixture, MJ ZX10 Bga Reballing Tool Kit for iPhone X Circuit Board Repair.
If the problem is something simple, like a cracked screen or a battery replacement it is something that is easy to fix yourself. If the problem needs further diagnosis, take the device into a specialist like Zagg Phone Repair. If you are up to the challenge to fix it yourself, follow these tips.
Tip One. Check the warranty. Most devices come with a warranty that provides coverage for accidents or technical glitches that occur within a certain time limit. If your device is covered under warranty you may be able to get a replacement at no cost to you.
Tip Two. Work at your own risk. One of the perks of leaving the repairs to a professional are they assume all the risks. When you do your own repairs there are no guarantees. So it is important to be aware of the risks before you start the work.
Tip Three. Use proper tools and parts. In order to do repairs properly, it is important to make sure the tools you are using are designed for the right purpose.
Tip Four. Prepare a clean workspace. Because smartphone repairs involve expensive technology and tiny parts, it is important to work on the device in a clean space. This will reduce the chance of dust or dirt from getting inside the device, which will only cause further problems.
Tip Five. Do not be afraid to ask for help. If the repairs seem complicated or the suggested repairs do not fix the problem get assistance from a specialist. Companies like PHONEFIX offer quality and affordable repairs for people in the same situation.
Tip Six. Document everything. Whether you do the repairs yourself, or have a specialist do them, you need to document everything. This will be helpful if there are further problems down the line
Details About HDMI Smart Integrated Microscope
Microscope is a very useful tool in our daily life, let me show you the details. At the same time, it is so essential for phone repair staff that we need to get it as an important tool in our phone reapir shop. Also, there are more functions and purpuses than what i list here. As for us, i highly recommended you use it to repair your damaged iphone mainboard.

1. 20MP HDMI 3.5X-90X Stereo Zoom Trinocular Microscope Phone Repair

3.5X-90X Trinocular Industry Inspection Zoom Stereo Microscope for Mobile Phone Logic Board Repair, 14MP 16MP 20MP HDMI Video Camera adapter for microscope, VGA / HDMI USB ouput Video Camera Microscope with LED light and protection glass, VGA / HDMI camera digital microscopes come with extension-type Microscope Stand Holder stents and metal base
Feature:
7X-45X zoom magnification power with crisp sharp images
Super widefield high-eyepoint optics
widefield of view
4" (100mm) working distance
Sturdy all-metal pillar stand
Powerful 56-LED ring light with dimmer
2. 14-20MP HDMI Universal Microscope Phone PCB Repair Inspection Microscope
14-20MP HDMI USB digital Industry Video Inspection Microscope Camera with TF Card Video Recorder, 14MP 16MP 20MP HDMI Digital Electronic Video Microscope Camera + 1400-2000 pixels CMOS sensor + 56 LED Ring Light + Stand Holder For Mobile phone PCB Board Repair, 14 16 20MP 1080P HDMI 0.7-4.5X Indusry Lab Microscope Camera for iphone Logic Board Repair
Microscope parameters:
Camera with HDMI USB 2.0 two output
Optical magnification: 0.7-4.5X
Variable ratio: 1: 6.5
Main lens matching size: 45mm
Working distance: 100-120mm
Minimum multiple: 0.7X working distance is 120mm visual range 18mm
Maximum multiple: 4.5X working distance is 100mm visual range 2-3mm
Photo eyepiece: Standard 0.5X / 1.0 / 0.35 - (0.35X 0.5X 1X 2X can be replaced) - optional
Auxiliary object mirror: None (0.3X 0.5X 1X 2X can be added) - optional
3. 0.7-4.5X Trinocular Integrated Microscope Portable HDMI Microscope Phone Repair
0.7-4.5X Trinocular Integrated Microscope has the HDMI output + USB2.0 output interface, All-In-One Portable optical magnification for phone logic board repair with 0.4X camera interface eyepiece. Continuous zoom adjustable range is ±5 diopters trinocular spectroscopy imaging
Product Parameters
Display: 10.6 inch IPS full-angle display, can be rotated 270°, left and right, can be folded 180°, back and forth
Digital Camera: 1/2.8 inch, 2 million pixels
Image Resolution: 1920*1080
Frame Rate: 45 frames/second
Output interface: HDMI output + USB2.0 output
Optical Magnification: 7-45X
How to Repair Your Deaf Mobile Phone
Imagine this, many yougster lie in the bed to play games, movie, how much time have been running out. However, the facts are not always this. Mobile phone plays a important role

Basic Sound Troubleshooting in phone –
Here are some step’s to fix your sound problem in your phone –
1- Check your phone volume – Press your volume up/down button and increase your volume.
2- Restart Your Mobile Phone and remove your headphone and clean your headphone jack .
3- Silent/ vibrate switch is turned on –
Go to the settings >
Tap on sound >
Go to the volume. Once you’re in that setting you can adjust the volume for music, ringtones and notifications.
4- Update your firmware –
Go to setting >
Tap on about phone/device
Now Tap on system update/ software update
Tap on check for update.
Download the most recent update for your phone.
5- Check your music app and clean cache-
Go to the setting and then
Tap on app’s
Go to your music player then click on clear data.
6- Remove moisture –
Switch off your phone, remove your battery/sim/memory card now you can remove the residue or moisture by waving a hair dryer on low heat over the phone.
Check the phone sound
7- Install an APP from play store
Install an app in your phone through play store and choose the media preference audio.
Choose on lets app decide.
8- you can also try this option –
The solution is simple, revive the speakers and receiver with the code *#*#0673#*#* and press speaker on, then receiver on and then again speaker on. In an instant every sound is back.
9- Reset Your Mobile Phone
You can also try to reset your phone i.e. restore your mobile phone to factory settings.
Go to setting.
Tap backup and reset.
Click on factory data reset (Erases all data on phone)
Remove SD card
Tap on reset phone.Now check your sound if not working then try step 6.
10- Factory Data Hard Reset-
Play back the recording on your external iphone speaker.
If you can hear the audio, the speakers are fine.
Now If you can’t, try performing a factory data reset but take the backup of your data .
if you don’t know how to reset your phone then read here.
If none of the steps above have fixed your Android speaker problem, get your phone checked out at a service center. You may have a hardware issue, which means you’ll need to have the speaker replaced.
I really hope this will help you out to fix your phone sound .
How to Solve Your iPhone Ringtone Function Failure
It is our pleasure to serve my customers when they have any problems cannot solve by themselves. So PHONEFIX will help you to solve them steo by step
1. Make sure the Ring/Silent button is turned on
If the iPhone ring/silent button is off, then the iPhone will go into mute mode,and you can't hear the ring. Because the ring/silent button is on the side the iPhone display screen, it's easy to toggle, so sometimes, you turn off the ring/silent button, and you don't know about it.
In order to check Ring/Silent button status, please check Ring/Silent button on the left side of your iPhone, if the iPhone is on silent, you will see a small orange line, please push the button towards the screen and turn the ringer on.
2. Check the iPhone volume button
Even if the iPhone isn't in mute mode, but the iPhone still won't ringing, because the iPhone volume level is lower.
In order to adjust the volume level on your iPhone 7, please go to Settings-> Sounds & Haptics, drag the slider all the way to the right to turn your ringer Volume up. Or you can press the iPhone volume up button on the side of the iPhone to increase the volume.
3. Make sure the Do Not Disturb or Airplane Mode is turned off
Do Not Disturb is an iPhone feature that is used to filter or set restrictions to stops notifications on incoming calls, and Airplane Mode blocks all cellular connections. So, if these two features is turned on, then the iPhone won't ringing.
In order to check iPhone Do Not Disturb feature, please to Settings -> Do Not Disturb, the button should be on left side. Or open the control center, make sure that the DND icon (moon in a black circle) is not enabled.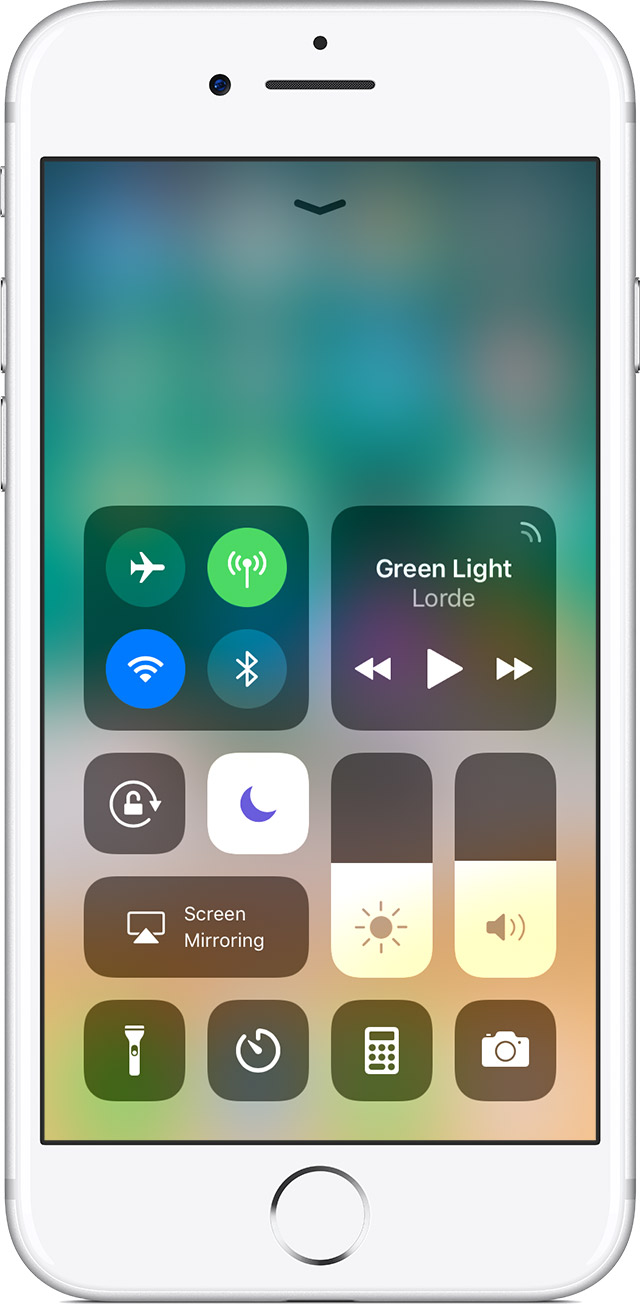
4. Check iPhone speaker
If the iPhone speaker is damaged, then you won't hear ringing when calls incoming.
In order to check iPhone speaker, please watch the video or play music with speaker mode. If the voice is normal and clear, which means the speaker is good. If you can't hear the voice that means the iPhone speaker is damaged. In this way, you need to repair it with phone repair tools.
5. Restart iPhone
The software errors also can cause iPhone not ringing, for many software errors, we can fix it by restarting.
For restarting iPhone 8P and earlier, please press and hold the iPhone power button until the slider appears, drag the slider to turn your device completely off, after the device turns off, press and hold the iPhone power button again until you see the Apple logo.
For restarting iPhone X, please press and hold the iPhone power button and either volume button until the slider appears, drag the slider to turn your iPhone X completely off, after your iPhone X turns off, press and hold the side button again until you see the Apple logo.
6. Send it to Apple Care/iPhone repair shop
If none of the above solutions not working, you can send it to Apple Care or iPhone repair shop to repair.